Fishing is more than just a hobby for many – it’s a way to unwind, connect with nature, and even challenge your skills. While buying a pre-made fishing rod is an easy option, building your own custom fishing rod offers an entirely different experience. It lets you craft a rod tailored specifically to your fishing style, giving you a greater connection to the sport and your equipment. If you’re a DIY enthusiast or just curious about the process, here’s a guide to help you build your own fishing rod.
1. Gather Your Materials
Before diving into the actual process of building the rod, you’ll need to gather all the necessary components. Here’s what you’ll need:
- Rod Blank: This is the backbone of your fishing rod. Rod blanks come in different materials such as fiberglass, graphite, and composite. Your choice will depend on the type of fishing you plan to do.
- Reel Seat: This component holds the fishing reel in place.
- Guides: These are the rings that help guide the fishing line along the rod. You’ll need to decide on the number and spacing of the guides.
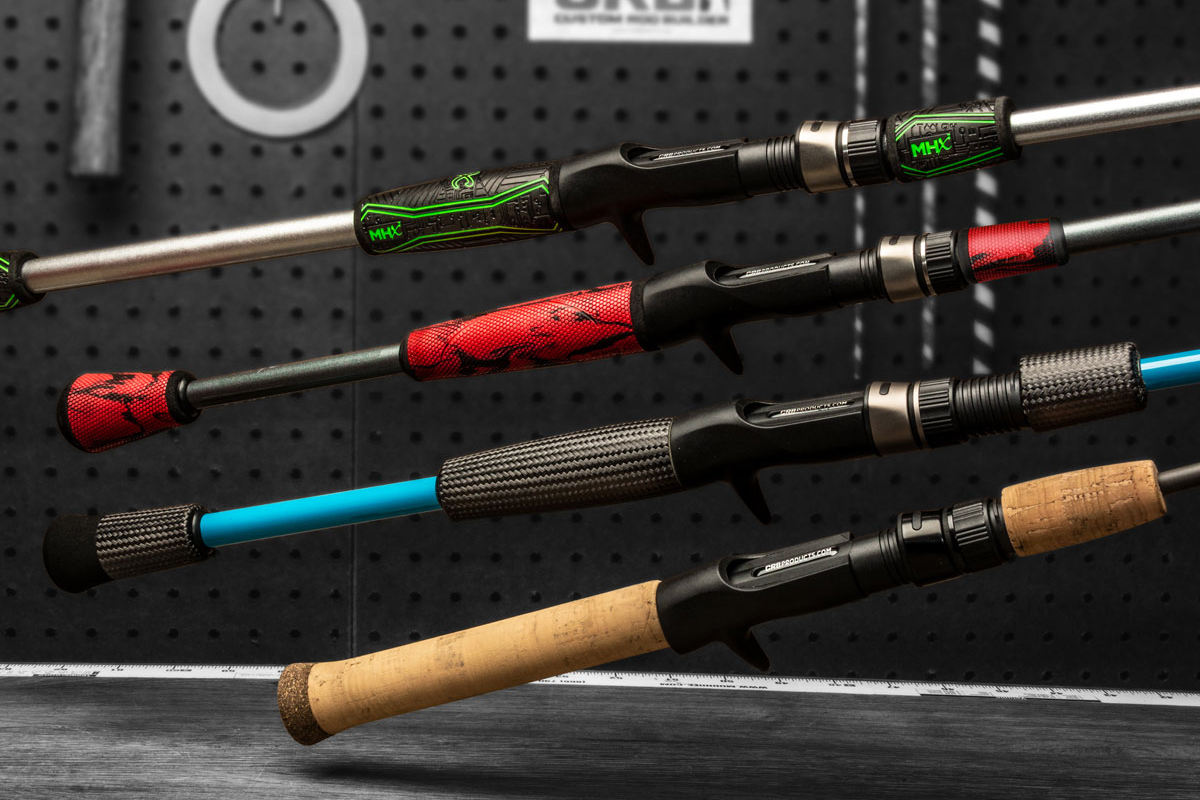
- Handle: Typically made from cork, EVA foam, or rubber, the handle provides grip and comfort while fishing.
- Thread: Used to wrap around the guides and secure them in place.
- Epoxy: This is used to coat the threads after wrapping the guides, providing durability and strength.
- Ferrules: These are the connectors that join sections of a multi-piece rod (if applicable).
2. Choose the Right Rod Blank
Selecting the right rod blank is crucial as it determines the flexibility, strength, and sensitivity of your fishing rod. For instance:
- Fiberglass Rods: Ideal for beginners and those seeking a more durable rod. They offer flexibility but are heavier.
- Graphite Rods: Lighter and more sensitive, making them a popular choice for experienced anglers. However, they can be more fragile than fiberglass.
- Composite Rods: These combine the best of both worlds, offering strength and sensitivity while being relatively lightweight.
Consider the type of fishing you’ll be doing, whether it’s freshwater or saltwater, as this will influence your choice of material.
3. Cutting and Preparing the Rod Blank
Once you’ve selected your rod blank, you may need to cut it to the desired length. The length of your rod will depend on the type of fishing you plan on doing. Longer rods are typically used for casting longer distances, while shorter rods provide more control and are ideal for close-range fishing.
Ensure the rod is clean and smooth before proceeding. Use sandpaper to remove any rough edges, especially if you plan on adding a handle or reel seat.
4. Installing the Handle and Reel Seat
The handle is the part of the rod you’ll grip, so comfort is key. Most fishing rod handles are either cork or EVA foam, with cork being more traditional and EVA foam offering a lighter option.
To install the handle:
- Slide the handle onto the end of the rod blank.
- Apply a layer of epoxy to the area where the handle connects to ensure a secure bond.
Next, attach the reel seat to the other end of the rod, where your fishing reel will sit. It should slide over the rod blank smoothly, with epoxy used to hold it in place.
5. Attaching the Guides
Guides are essential for controlling the fishing line, and the right placement is vital. Typically, the guides are placed in a spiral pattern along the rod, with larger guides closer to the handle and progressively smaller guides towards the tip.
- Start by placing the first guide near the reel seat and work your way towards the tip.
- Mark the placement of each guide on the rod blank.
- Use thread to securely wrap each guide in place. It’s important to ensure the guides are aligned correctly to prevent any issues with the line.
6. Wrapping the Guides
Once your guides are in place, use thread to wrap them tightly. The wrapping process is a delicate one and will require patience. You’ll need to wrap the thread around the guide’s foot in a crisscross pattern, ensuring it’s snug and secure.
After wrapping, use epoxy to seal the threads. This step ensures that the wraps stay in place and adds an extra layer of protection. Be careful not to apply too much epoxy – a thin, even coat will suffice.
7. Final Touches and Curing
Once the epoxy has dried and set, inspect your rod for any imperfections or loose components. At this stage, you can add any finishing touches, such as a protective coat of varnish or decorative wraps on the handle or guides.
Allow your rod to cure completely, which can take up to 24 hours. Once it’s cured, you’ll have a sturdy and custom-built fishing rod ready to use!
Conclusion
Building your own fishing rod is a rewarding and hands-on experience. Whether you’re looking for a rod tailored to your specific needs or you just enjoy the craft of building, this DIY project can provide both practical use and a deep sense of satisfaction. By following the steps outlined above and choosing quality materials, you’ll have a custom fishing rod that feels just right for your next adventure.

